
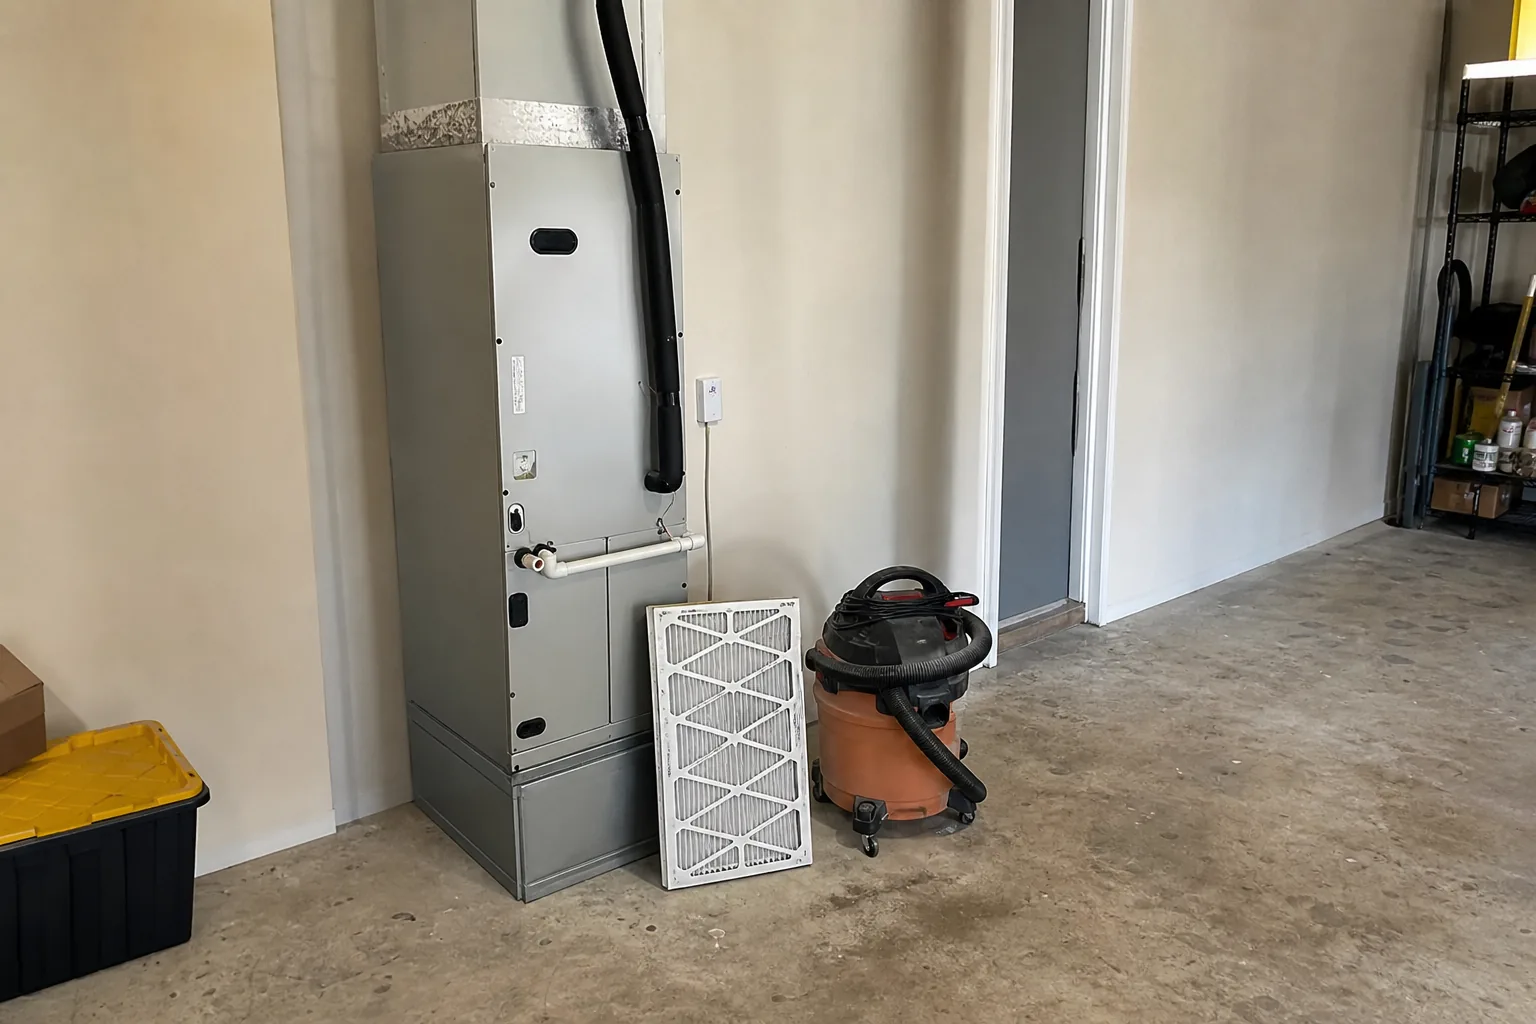
Should Bay Minette Homeowners Worry About the Labor Day HVAC Audit?
A Bay Minette Labor Day HVAC audit, presented as a recipe card. Ingredients, steps, yields. Skip a step and the dish doesn't work.
Published 2026-09-03 · Updated 2026-09-03
Author: Landon Jahnke | ACExperts251
Reviewed by: Landon Jahnke · Owner · Alabama HVAC License AL #16117 · EPA 608 Certified
Recipe: Bay Minette Labor Day HVAC Audit
Ingredients (gather before you start):
- 1 multimeter ($20 at Lowe's — get one with a microfarad function)
- 1 fresh MERV 8 filter ($8, sized to your return)
- 1 garden hose with adjustable nozzle
- 1 small bottle condensate drain biocide ($6)
- 1 wet-dry vacuum (optional but useful)
- 30 minutes of attention
- A flashlight
- A notepad
Yields: One HVAC system that survives until April with zero emergency calls.
Step 1: With the system off at the breaker, walk to the outdoor unit. Visually inspect the cabinet, the fan blade, and the contactor.
Step 2: Rinse the outdoor coil from the inside out using the garden hose.
Step 3: Pull the indoor air handler panel and check the evaporator coil and drain pan.
Step 4: Flush the condensate drain line with water and biocide.
Step 5: Read the capacitor microfarad value with the multimeter.
Step 6: Replace the air filter and verify the float switch operation.
Step 7: Restart the system and observe a full 15-minute run cycle.
Follow the recipe in order. Skip a step and the dish doesn't work.
Here's the recipe.
Step 1: Outdoor visual inspection
System off. Breaker off. Confirm the disconnect at the outdoor unit is pulled.
Walk around the condenser. Look for the things that mean immediate intervention.
Bent fins. Hail damage, weed-eater damage, lawn furniture damage. A few bent fins are cosmetic. A 6-inch span of flattened fins means a 5-10% loss in heat transfer at that location. A fin comb ($12) straightens them. Most Bay Minette homes show some damage by September.
Vegetation contact. Anything growing within 18 inches of the cabinet is restricting airflow. Cut it back. Hedges, knockout roses, the volunteer pecan sapling that came up in July — clear all of it.
Cabinet rust. Surface rust is normal in Bay Minette inland conditions. Cabinet rust that has perforated the metal — actual holes — is a structural concern that doesn't fail this winter but starts the replacement conversation for spring.
Loose hardware. The outdoor unit accumulates vibration loosening over a heavy summer. Walk the cabinet, check the screws holding the top grille, the side panels, and the fan motor mount. Hand-tight is fine. Anything that wiggles freely needs attention.
Note what you find. Move to step 2.
Step 2: Rinse the outdoor coil from the inside out
Remove the top grille (usually 4-6 screws around the perimeter). The fan motor will lift out with the grille — set it carefully to the side without disconnecting the wires. Don't bend the wire harness sharply.
You're now looking down into the cabinet at the back of the coil from the inside.
Rinse with the garden hose, set to a moderate-pressure fan spray — not a needle jet that could bend fins. Spray from the inside of the cabinet outward, pushing dust, pollen, cottonwood debris, and accumulated grime out through the coil.
This is the most important physical-cleaning step in the entire recipe. Bay Minette outdoor coils accumulate a season's worth of pine pollen, lawn dust, dryer lint from neighboring vents, and the gray-brown organic film that builds up on every condenser within walking distance of an oak tree. A coil that looks clean from the outside is often 30-40% blocked when viewed from the inside.
Rinse for 4-6 minutes. The water draining out the bottom of the cabinet should run from gray-brown to clear. Stop when the runoff is clear.
Reassemble the top grille. Move to step 3.
Step 3: Indoor evaporator and drain pan inspection
Move inside to the air handler. Most Bay Minette homes have either a hall closet air handler or an attic-mounted unit. Find it.
System still off. Pull the access panel that exposes the evaporator coil. On most modern air handlers it's the front-facing panel held by 4-6 screws. On older Goodman or Rheem units it may be a slide-out panel with a single retaining clip.
Look at the coil with the flashlight. What you want to see: clean aluminum fins, slight uniform discoloration, no visible mold growth, no debris accumulation in the bottom rows.
What you may see in a Bay Minette home that's been running hard since June: a layer of gray fuzz on the upstream side of the coil (filter wasn't changed enough), black spotting on the lower rows (incipient mold), or a bottom-row tarry buildup (organic growth combined with condensate-drain backflow).
Light fuzz is wipeable with a soft brush. Black spotting needs a coil cleaner — non-acid, non-rinse formulations from a hardware store work for homeowner application. Tarry buildup typically requires a professional pull-and-clean and is a flag to mention on the next service call.
Look at the drain pan beneath the coil. Standing water in the pan after the system has been off for an hour means the drain line is partially clogged. Note it for step 4.
Replace the access panel. Move to step 4.
Step 4: Condensate drain flush
The condensate drain line runs from the air handler drain pan to either an outdoor termination, a utility-room floor drain, or a sink trap. Find the termination point.
Most Bay Minette homes have a 3/4-inch PVC drain that exits the side of the house at exterior ground level. Look for it on the wall closest to the air handler.
You're going to flush it from both ends.
From the access tee at the air handler. Most properly installed systems include a vertical access tee on the drain line within 6 feet of the air handler. The tee has a removable cap. Pull the cap, pour 1/4 cup of condensate biocide down the tee, then pour two cups of warm water behind it. The water and biocide should drain quickly. If they back up, the line is partially clogged downstream — work to step 4b.
From the outdoor termination (4b). Take the wet-dry vacuum to the outdoor end of the drain line. Hold the vacuum hose against the open end of the PVC, sealing as best you can with a rag wrapped around the connection. Run the vacuum for 60-90 seconds. The vacuum pulls the slug of organic growth back out toward the termination.
After vacuuming, return to the access tee and re-flush with water. Should drain freely now.
If it still doesn't drain, you have a hard clog or a sag in the line that needs professional attention. Note it.
Move to step 5.
Step 5: Capacitor microfarad reading
Power off, breaker off, disconnect pulled at the outdoor unit. Confirm by attempting to start the system at the thermostat — fan should not engage.
Pull the service panel on the side of the outdoor cabinet. The capacitor is the silver or black cylinder mounted to a bracket inside, with two or three wire terminals on top.
Critical safety step: capacitors hold a charge even with power removed. Discharge the capacitor before touching the terminals. Use an insulated screwdriver with a 10-20K ohm resistor across the blade — not a bare screwdriver, which produces a violent spark and can damage the capacitor or the meter you're about to use. Hold the resistor across the C terminal and the HERM terminal for 5 seconds, then C terminal and FAN terminal for 5 seconds.
Disconnect all wires from the capacitor. Note where each wire was connected (phone photo before disconnecting works).
Set the multimeter to microfarad mode. Touch the leads to the C-HERM terminal pair. Read the value. Compare to the rated value printed on the capacitor (typically labeled as "45/5 µF" or similar — the first number is the HERM/compressor side, the second is the FAN side).
Within 6% of rated: capacitor is healthy. 6-10% below rated: capacitor is degraded but functional. Plan replacement at the next professional service. 10%+ below rated: capacitor is failing. Replace before next cooling season. A failed capacitor is the #1 cause of April emergency calls in Bay Minette.
Repeat for the C-FAN terminal pair.
Reconnect the wires. Reinstall the service panel. Move to step 6.
Step 6: Filter swap and float switch verification
Inside the air handler, find the filter slot. Pull the old filter. Place it in front of a window — if light passes through readily, the filter has another two weeks. If the light is significantly blocked, the filter is overdue.
Either way, replace it with the fresh MERV 8 filter you brought. Note the install date in marker on the filter frame.
Find the float switch. It's mounted on the secondary drain pan or the primary drain line, usually a small white plastic device with two wires. With the system still off, push the float manually upward. You should hear a faint click as the switch opens.
The float switch is what shuts the system off if the drain pan overflows. A stuck or disconnected float switch is the difference between a $15 drain clog and a hallway ceiling soaked through the drywall.
Reset the switch. Move to step 7.
Step 7: Restart and observe
Restore power. Set the thermostat to call for cooling — 4-5°F below room temperature so the system commits to a full cycle.
Start the timer.
First 90 seconds. Outdoor fan should engage within 8 seconds of the indoor blower starting. Compressor should engage within 12-15 seconds and reach full speed in another 5 seconds. Smooth ramp-up, no hard hum, no clicking from the contactor.
Two to five minutes. Walk the supply registers in the house. Each register should be delivering noticeably cool air at this point. Touch the supply duct near the air handler — should be cold within 90 seconds of compressor start.
Five to ten minutes. Check refrigerant lines at the outdoor unit. The larger insulated suction line should be cold to the touch — actually cold, not just cool. The smaller liquid line should be warm. Frost or ice anywhere on either line is a refrigerant or airflow problem that needs professional attention.
Ten to fifteen minutes. Let it climb back to setpoint slowly. Listen to the outdoor unit from 10 feet away. The sound should be steady — a fan whoosh and a compressor hum at constant pitch and volume. Surging, cycling, or volume changes during steady-state operation indicate a problem.
If everything in the 15-minute observation is clean, the system is running the way the engineers intended. The audit is complete.
If anything in the observation feels wrong, write down what you observed and call in the diagnostic.
What the recipe doesn't catch
The DIY audit catches roughly 70% of preventable failure modes. The 30% it doesn't catch are the ones that require gauges and trained interpretation.
Refrigerant pressure and superheat/subcool measurement. A system that's slightly low on refrigerant cools acceptably in September because the load is dropping but fails to maintain temperature on the first 90°F day in April. Gauges and a digital thermometer catch this. The DIY observation step doesn't.
Contactor surface evaluation. Pitting and arc damage on a contactor surface that's still functional in September can become a stuck contactor in March. A trained eye reading the wear pattern under magnification catches this. The DIY visual doesn't.
Static pressure measurement across the air handler. Filters and ductwork can be marginal in ways that aren't obvious from the airflow you feel at registers. A manometer reading at the supply and return plenums catches this. The DIY method doesn't.
For homes where the homeowner wants the full picture — particularly older Bay Minette homes with retrofit ducts where the duct conditions are often the real story — the professional audit catches the items the DIY pass can't.
When the audit reveals a real problem
Sometimes the recipe surfaces something that wasn't expected.
Capacitor measurably below rated. Replace before spring rather than waiting for the emergency call. Scheduled replacement is always cheaper than the springtime emergency equivalent.
Drain line completely blocked. Professional pull-and-clean of the drain pan plus a vacuum service of the line. The alternative is the drain pan overflow that ruins the ceiling.
Outdoor coil heavily blocked despite a thorough rinse. The deep fouling is past what a hose can reach and needs a coil cleaner application or a pull-and-rinse service. A heavily blocked coil costs real money in extra electricity in a single Bay Minette summer.
Refrigerant frost on the suction line. Likely undercharge or low airflow. Don't run the system continuously. Schedule the diagnostic.
In each case, addressing it now is meaningfully cheaper than addressing it during the spring restart panic.
Bay Minette and the broader picture
Most Bay Minette homes carry retrofit ductwork from the 1970s and 1980s that isn't part of the recipe but matters more than any single component. If your Labor Day audit reveals airflow imbalances, comfort variation by room, or registers that don't deliver what they should, the next conversation is about duct conditions — sealing, insulation, and where applicable, partial replacement. The Bay Minette pre-summer mistakes piece and the Spanish Fort tight-build humidity walkthrough cover overlapping ground from different angles.
The recipe is the kitchen prep. The duct story is the meal.
For homeowners who'd rather have it done professionally, the Comfort Plan ($20/month or $240/year) includes two tune-ups per year — the Labor Day audit fits naturally into the fall visit. The math on the plan vs. one-off audits favors the plan after the first year for most Bay Minette households.
Phones are answered Monday-Saturday 8am-6pm; emergency calls around the clock, every day of the week with no Saturday upcharge. The Labor Day window for booking the professional audit tends to fill up by mid-September — early October slots are usually the next opening before the heating-call season takes over.
The recipe works. The dish is reliable. Bring the ingredients.
FAQ
- Why does the Labor Day audit matter for a Bay Minette home specifically?
- Bay Minette systems run their hardest cycles in July and August — older retrofit equipment in homes from the 1970s and 1980s pulls 12 to 14 hour days through the worst of the heat. By Labor Day, the system has accumulated capacitor stress, condensate sludge, contactor wear, and outdoor coil fouling that wasn't there in May. Catching those four conditions in early September — before the system idles through fall and the components seize from disuse — is what keeps the spring restart smooth instead of producing the April emergency call. Bay Minette homes don't get the salt-air corrosion that Gulf Shores systems do, but they accumulate inland heat-cycle damage that the audit catches.
- Can a Bay Minette homeowner do the Labor Day audit themselves?
- Most of it, yes. Filter swap, outdoor coil rinse, condensate drain flush, and a visual on the capacitor and contactor are all homeowner-doable with a small bag of supplies and a Saturday morning. The capacitor microfarad reading and the refrigerant pressure check require a meter and gauges that most homeowners don't own — those two steps justify the professional audit when budget allows. The DIY version still catches a large share of the problems a professional audit catches. Doing nothing catches zero.
- What's the cost difference between the audit and an emergency call in April?
- The professional audit is the standard $79 service-fee visit (credited to authorized work), or it's included as a tune-up under the Comfort Plan ($20/month or $240/year, which also covers $0 service fees on follow-up calls). An emergency call in April when the system won't restart after the off-season idle costs the diagnostic fee plus parts and labor, and can run materially higher if the failure happens on a weekend or holiday. A capacitor that reads low in September and gets caught during the audit costs far less to address proactively than the same capacitor failing on the first 85°F day. The audit doesn't always prevent the emergency, but it eliminates a big share of preventable failures.
- Do I need this audit if my Bay Minette system is only three years old?
- Yes, but the focus shifts. On a three-year-old system, the audit is less about catching failing components and more about verifying that nothing has drifted out of spec, the warranty registration is current, and the duct conditions in the house haven't shifted. New systems in Bay Minette retrofitted into older ductwork from the 1970s or 1980s often develop static pressure problems or airflow imbalances that a Labor Day audit catches early. The capacitor and contactor on a young system are usually fine; the duct and humidity story often isn't.
Need this handled?
Straight to the service page for your town — pricing, local details and a form that reaches a technician.
More from Labor Day

ACExperts HVAC
We Take The Heat So You Don't Have To
Fast, honest heating and air service across Baldwin County. Speak with a technician and get on the schedule today.